Step 1: Select Appointment Date and Time
- If you are not on the appointment page - Access the Appointment Book: From the Menu on the left, choose Appointments.
- Select a Date: Use the calendar option or quick navigation buttons at the bottom to find the desired day.
- Choose a Time: Select a time slot in the relevant employee's column.

Step 2: Choose a Customer
- Quick Selection: Choose a customer from one of the predefined categories.
- Search: If needed, search for the customer by name, phone number, or email. Must have at 3 charters to search name

- Customer Overview: After selecting, you'll see the customer's details and can add appointment notes or alert messages.

Step 3: Add Appointment Tags (Optional)
Select any relevant tags from the list to categorize the appointment.

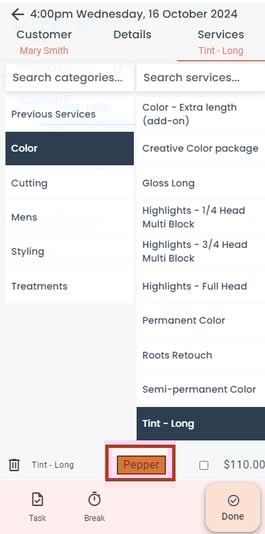
Step 4: Select Services
- Previous Services: You can select from the customer's previous services.
- New Services: Alternatively, choose a service category and select a new service.
- Special Requests: If the customer has a request for a specific employee, tick the "Request" box.
Step 5: Confirm and Complete
- After reviewing the details, press Done to finalize the appointment.

Alternative Method: Quick Booking via Time Bar
- Select a Time: Choose a time slot from the left-hand side of the Appointment Book.
- Choose an Employee: After selecting a time, pick an employee and continue with the usual steps.