Steps for using End of Day
1.Check for Pending Sales
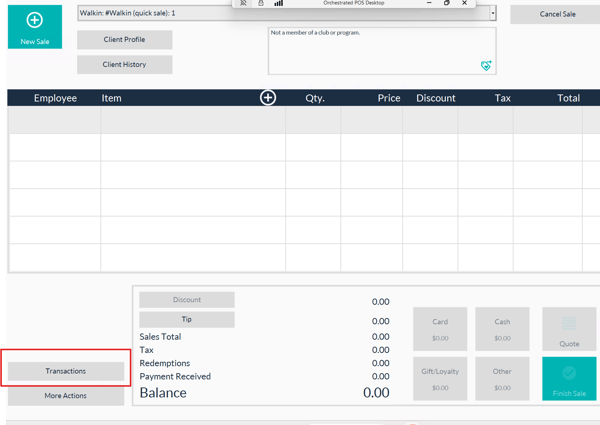
Navigate to Main > Point of Sale.
-
Use the dropdown menu to confirm there are no pending sales needing processing.

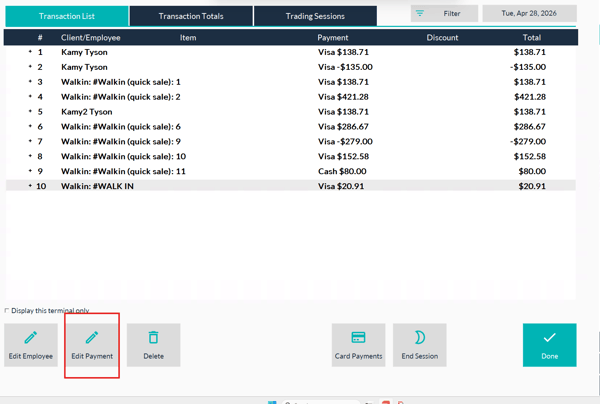
2. Access Transaction Summary
-
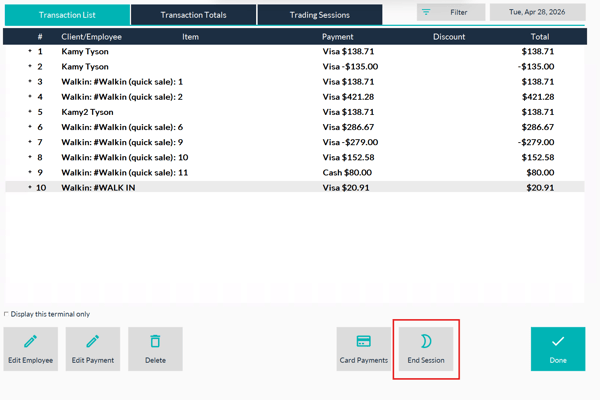
Click the Transaction button (bottom left).
3. Review all processed sales
4. Start the EOD Session
-
Click End Session.
-
If it’s your first time, enter your float value. For subsequent sessions, this step will not require setup.
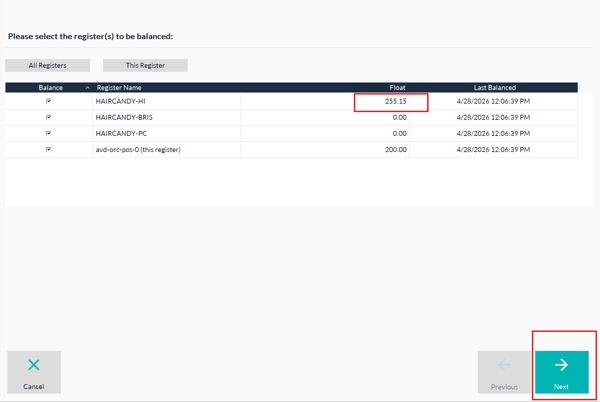
5. Check float amount and the Till/s you wish to count select next
6. Enter in the total Cash takings (do not include the float in the taking amount)
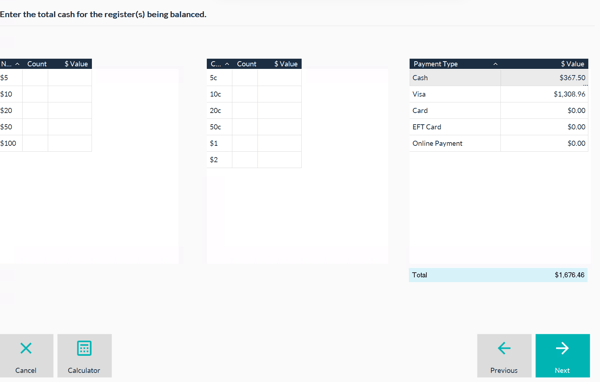
- You can use the count tool or just enter the balance total for the cash
EFT payments types
- If you have a integrated terminal your EFT amounts will automatically populate, no need to print a pre settlement report from the ShortcutsPay terminal. (settlement of ShortcutsPay Terminal will happen automatically over night)
- If you are using a stand alone terminal (Not ShortcutsPay Terminal) and have turned on the setting to auto populate the EFT totals you will need to visually check the amounts to match your pre settlement report from your stand alone terminal. You can not change the amount manually you will need to amend transactions via Point of Sale.
-
If you have standalone terminal with no auto population of cards payments enter the amounts in each area based on the Pre settlement report from your stand alone terminal.
7.Click next once amounts are entered.
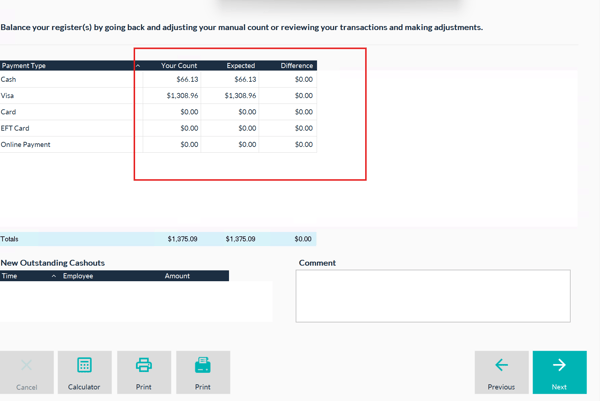
8. Check your Count and the Expected match continue to the next screen
Your expect count doesn't match:
-
-
If the till doesn’t balance:
-
Recount cash and double-check transactions.
-
Ensure no pending sales are left in the dropdown menu.
-
Use the Previous button in the EOD wizard to make adjustments.
- You might need to edit payment types/ void transactions or complete a new sale.
-
-
Cross-Check Records
- Print/visually check the transaction summary to cross-check against receipts and appointments.
If the variance persists, leave a comment or reason explaining the discrepancy and continue to the next screen.
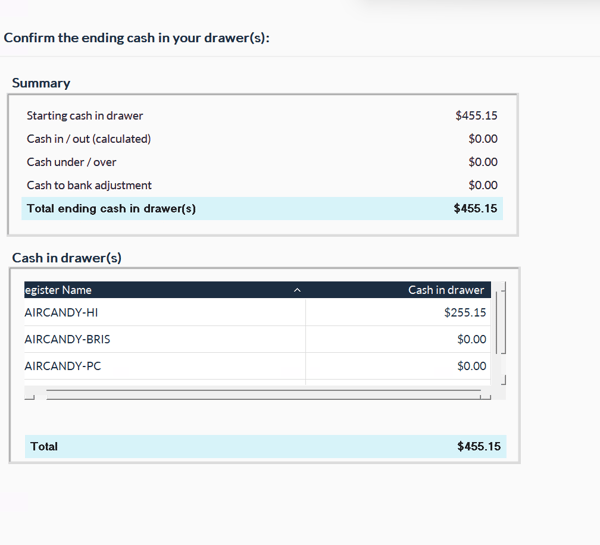
9.Finalise the EOD Process
-
Confirm the ending cash in the drawer equals the float and click next
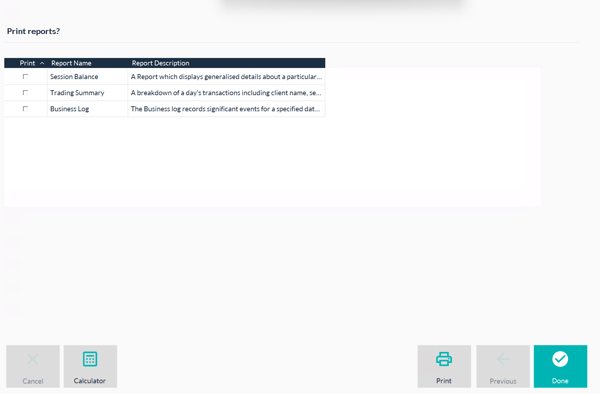
10. Review printing options:
-
-
-
Print session balance and trading summary reports if needed.
-
Reports can also be accessed later via Tools > Reports.
-
-
Optional Actions
-
View Session Balance Reports
-
Navigate to Tools > Reports.
-
Expand the End of Day category and select a session.
-
View, export, or print details, including timestamps, attempts, and notes.
-
-
Email Reports
-
Export session balances for attachment to emails.
-